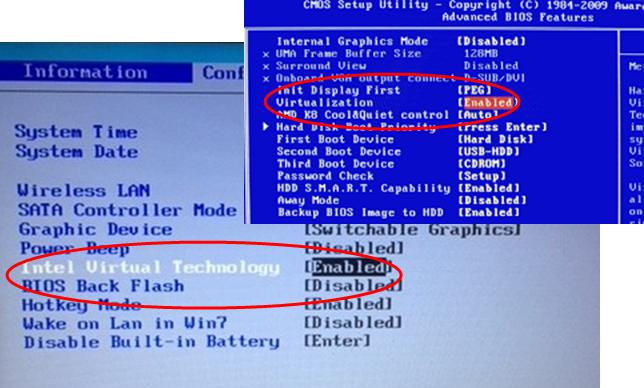
The only way to enable the virtualization functionality for your CPU and Operating System is to do so through the BIOS. Virtualization enables the user to run multiple instances of an operating system or application on the same computer at once.
This article reveals all steps to enable virtualization through the BIOS properly as well as show you how to check if your PC supports this function.
You will find the general steps as well as motherboard brand-specific steps on how to safely enable the virtualization option.
Table of Contents
How To Check Virtualization Support in BIOS
Before enabling virtualization in the BIOS, first, check if your CPU supports it.
The simplest way to check if your CPU can support this feature is by following these steps:
This image above is how it appeared in my case. Note that if your CPU Is not capable of virtualization, it will not appear there or be set to “Disabled” or “Not available.”
How to Enable Virtualization in BIOS
Note that all BIOS appear with a different interface depending on the manufacturer. Find the exact naming in the steps below, search for ones with similar names.
For example, MSI boards have the virtualization toggle option on their “Overclock” tab, while ASUS has them under “Advanced”.
The steps below are the universal ones.
After applying these settings, make sure to stress-test your system to handle the new load of running multiple software instances at once.
If your computer or server crashes after this setting, use the same steps and disable any hardware virtualization.

If you can’t find these settings, we also feature a short guide below on the exact steps to enable virtualization for the most popular motherboard brands.
How to Enable Virtualization on an MSI Motherboard
MSI motherboards feature an easy-to-navigate interface. Follow these steps to enable virtualization.
Note that virtualization is on by default for AMD CPUs of the newer generations.
How to Enable Virtualization on ASROCK Motherboards
The steps on ASROCK motherboards are similar to the ones above. For example, their newer motherboard models feature an identical layout.
It’s the same for AMD processors; you have to enable “AMD-V” in addition to SVM.
How to Enable Virtualization on GIGABYTE Motherboards
On some Gigabyte models, you need to click on Advanced > CPU configuration > Enable SVM instead.
How to Enable Virtualization on ASUS Motherboards
Note that on some models of ASUS motherboards, you need to toggle VT-D and SVM.
If f7 is not working for you, the advanced mode is located as a button on the top right of the screen.
Virtualization Enabled in Bios but Not Working
The most common reason for this is that even though you enable Virtualization through the BIOS, you still haven’t disabled the Hyper-V Manager.
To disable it follow these steps-
If the following steps don’t help and you are sure that virtualization is enabled in your BIOS, troubleshoot your VM instead with these steps below.
Reboot the Virtual Machine as Well as the Host
If your system runs into a loop or has a memory leak, rebooting the VM and the host system will reset all currently allocated RAM. Most issues related to VM’s come from RAM leaks or corruption.
Migrate to a Different Host
1. Enter the VMware or vSphere consoles, depending on which one is installed
2. Right-click the machine you want to migrate to and click “Migrate.”
3. Search for “Change Host as the Migration Type”
4. Follow the configuration steps by clicking Next and Finish
5. Apply all changes
Update All of Your VM and VMware Tools
No matter which software you choose to emulate or run a virtual machine, if that software version is outdated, it might not be compatible with the latest settings or requirements of the host system.
Suppose you are constantly getting crashes trying to start up your virtual machine. In that case, it’s most likely that it was not enabled in the BIOS settings.
All motherboard manufacturers have different ways of enabling virtualization. If in a rut, check online for a specific tutorial for your motherboard brand.
Optimization and having an overhead of performance are critical when running any VM.


